Have you ever looked at a picture of a dish and been mesmerized by its intricate detailing and vibrant colours? Have you ever wished you could create something just as appetizing in your own kitchen? Well, now you can! In this blog post, we will explore the wonderful world of food art – from tips on how to get started to ideas for creating your own fun and tasty masterpieces. Get ready to learn all about the culinary delights that await in the world of food art!
Introduction to Food Art
If you’re like most people, the idea of creating art with your food probably seems a little bit strange. After all, Isn’t food supposed to be eaten, not looked at? But as anyone who’s ever been to a modern art museum can tell you, sometimes the line between what’s considered “art” and what’s not can be pretty blurry. So why not blur it even further by creating some delicious-looking (and -tasting) masterpieces in your own kitchen?
With a little imagination and some basic kitchen skills, you can transform even the simplest of dishes into something that’s both beautiful and delicious. Not sure where to start? Here are some easy tips for getting started with food art:
Choose your canvas wisely.
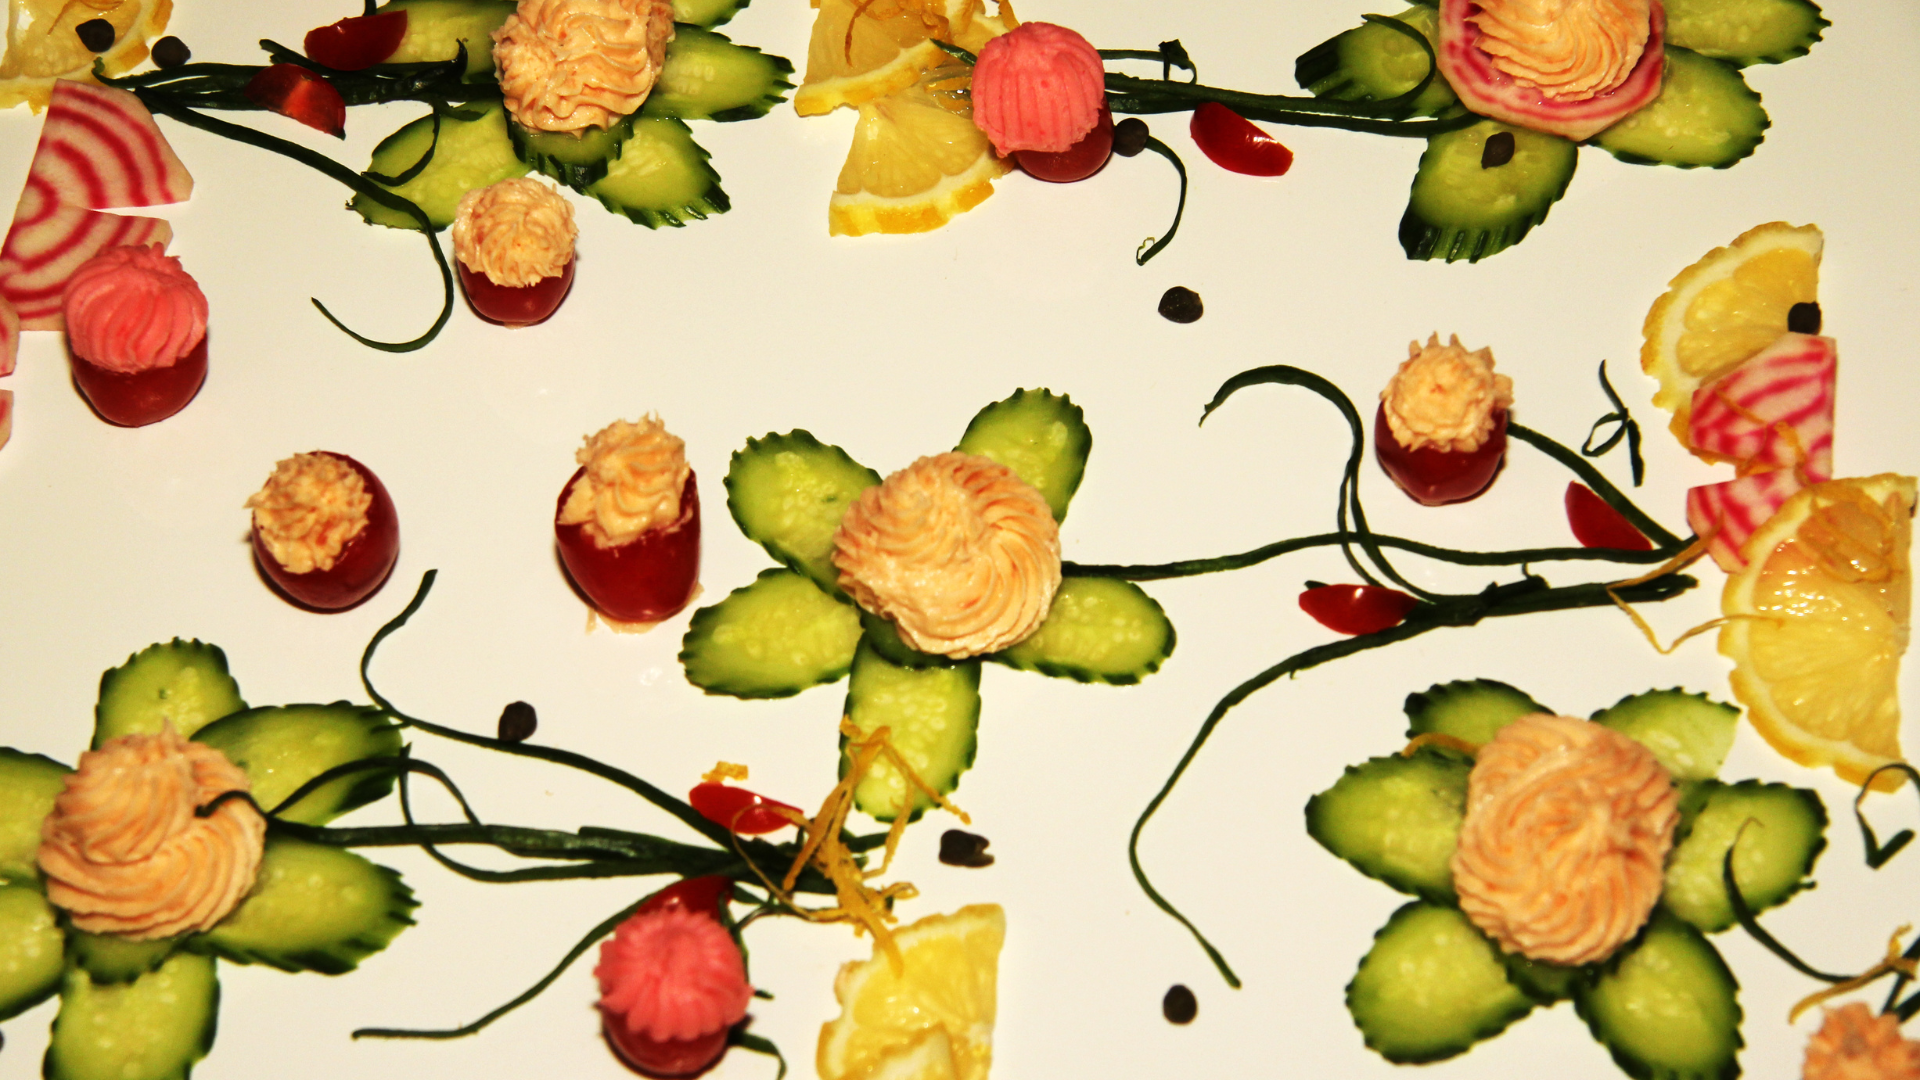
When it comes to food art, the sky (or rather, the plate) is the limit. But if you’re just starting out, it might be helpful to choose a simple canvas on which to display your artwork. A white plate or bowl will provide a blank slate for you to work with, while a dark-coloured one will help make your colours pop.
Use quality ingredients.
Just like any artist worth their salt knows that good materials are essential for creating a masterpiece, so too should you use quality ingredients when crafting your culinary creations. After all, there’s nothing worse than putting all that effort into making something look beautiful only to have it taste terrible because you used subpar ingredients.
What Materials Are Required?
If you’re interested in exploring the world of food art, there are a few materials you’ll need to get started. First, you’ll need some good quality food colouring. You can find these at most craft stores or online. You’ll also need some kitchen tools like piping bags and tips, as well as some basic knowledge of how to use them. Finally, it’s helpful to have a few stencils or templates on hand to help you create your designs.
With these materials, you’ll be ready to start creating your own fun and delicious food art masterpieces!
Different Types of Food Art Projects
- Fruits and Vegetables: Carve different shapes out of fruits and vegetables for a healthy and fun snack.
- Cakes and Cookies: Be creative with icing and decorating techniques to turn your cakes and cookies into works of art.
- Sandwiches: Layer different colours and textures of bread, meats, cheeses, and veggies to create an eye-catching sandwich.
- Pizzas: Get creative with your pizza toppings to create a unique work of art.
- Plated Meals: Arrange your food in an attractive way on the plate to make a meal that is both pleasing to the eye and the palate.
Step-by-Step Guide to Creating Food Art
Assuming you want a step-by-step guide to creating *any* kind of food art:
- Choose your canvas. This can be anything from a plate or bowl to parchment paper or even aluminium foil. Be creative!
- Select your colours. Again, get creative! Use fruits, vegetables, sauces, and other food items as your palette.
- Begin painting! Use a variety of techniques to create your work of art. Some common methods include:
- Dipping: Using a toothpick or other sharp object, dip into your chosen colour and then apply it to your canvas in the desired pattern or design.
- Brushing: Similar to dipping, but with a brush instead of a toothpick. You can use any type of brush, from a paintbrush to a Q-tip.
- Squeezing: This technique works best with thicker liquids like ketchup or yoghurt. Simply place your canvas beneath the food item and squeeze away!
Ideas for Simple, Easy, and Fun Food Art Projects
- Use cookie cutters to create fun shapes with fruits and vegetables.
- Make fruit kabobs and use them as skewers for other foods.
- Cut fruits and vegetables into thin slices and arrange them into patterns or shapes on a plate.
- Create a smiley face or other designs by placing different foods on top of each other.
- Use a toothpick or skewer to draw lines or write words in peanut butter, chocolate sauce, or other thick toppings.
- Cut sandwiches or pizzas into interesting shapes using cookie cutters before serving them.
Creative Ways to Use Leftover Ingredients to Create Amazing Displays
When it comes to food art, the sky is the limit in terms of what you can create. However, if you’re running low on supplies or just don’t have the time to go out and buy everything you need, there are still plenty of ways to create amazing displays with what you have on hand. Here are some creative ideas for using leftover ingredients to make beautiful (and delicious) works of art:
- Use colourful fruit and vegetables to create a vibrant abstract painting-on-a-plate.
- Get creative with your cookie cutter collection and use different-shaped cutters to make an interesting design in a plate of sandwiches or appetizers.
- Turn leftover cake into a fun sculpture by stacking layers of different colours and flavours.
- Use herbs and spices to create unique patterns on top of white frosting.
Make a statement with your place setting by using foods with contrasting colours and textures. For example, pair ripe strawberries with creamy brie cheese or juicy watermelon with crumbly feta cheese.
With a little imagination, you can turn even the simplest leftovers into a work of art!
Tips for Making the Most Out of Your Food Art Pieces
If you’re looking to get creative in the kitchen and create some fun, tasty masterpieces, then you’ll want to check out these tips for making the most out of your food art pieces.
Choose the right canvas:
When it comes to creating food art, the sky’s the limit in terms of what you can use as your canvas. From slices of fruit or veg to cookies and cakes, there are plenty of options to choose from. Just make sure that whatever you select is suitable for the design you have in mind.
Use quality ingredients:
The better the ingredients you use, the better your food art will look (and taste!). So, if you’re planning on using fresh produce, make sure it’s ripe and in season. And if you’re working with dry goods like flour or sugar, opt for organic or all-natural varieties.
Get organized:
Before you start creating your masterpiece, it’s important to get organized and have all of your supplies ready to go. If you find this is something you really enjoy and want to do often, it might be worth consulting with a handyman in Ossian, or a more local area, who can create storage solutions for all your supplies and appliances. This way, you can focus on being creative and not worry about hunting down that one ingredient you need.
Be patient:
Rome wasn’t built in a day and neither is great food art. So take your time and don’t be afraid to experiment. After all, part of the fun is in the journey, not just the final product!
Food art is a fun and creative way to express yourself in the kitchen. With just a few simple ingredients, you can craft unique and eye-catching dishes that are sure to impress your family and friends. Whether you choose to create an intricate work of food art or simply make something tasty for dinner, the possibilities are endless! So get out there, experiment with different techniques, and have some fun creating beautiful works of food art!